In this article:
- Overview
- Audience
- Prerequisites
- Boxes
- Boxes Page
- New Box
- Box management
- Contacting Cloud Application Manager Support
Overview
This article is meant to assist Cloud Application Manager customers who want to create and manage boxes.
Audience
Cloud Application Manager Users using Application Lifecycle Management (ALM) features.
Prerequisites
- Access to Applications site (Application Lifecycle Management module) of Cloud Application Manager as an authorized user of an active Cloud Application Manager account.
Boxes
Boxes are the templates that store application automation. An instance is a box you install on virtual infrastructure provisioned to a public, private cloud provider, or your own infrastructure. Take a quick tour to understand the layout of boxes and instances in Cloud Application Manager.
Boxes contain scripts, variables, and metadata to automate processes when instantiated on cloud infrastructure. Stitched together, boxes model complex processes like deploying or upgrading multi-tier enterprise scale applications.
So how do boxes work?. A typical application stack may consist of multiple boxes, each one modeling a step of the application’s install. For example, one might model the install of runtime requirements (such as PHP libraries). Another might model the install of a web server (such as Apache). And a third might model connecting to a source control repository (such as Git), pulling the latest code, and installing it on the virtual server. When stacked and instantiated these three boxes install an application. At the same time, each box is independent, reusable and can be consumed by other applications.
Boxes Page
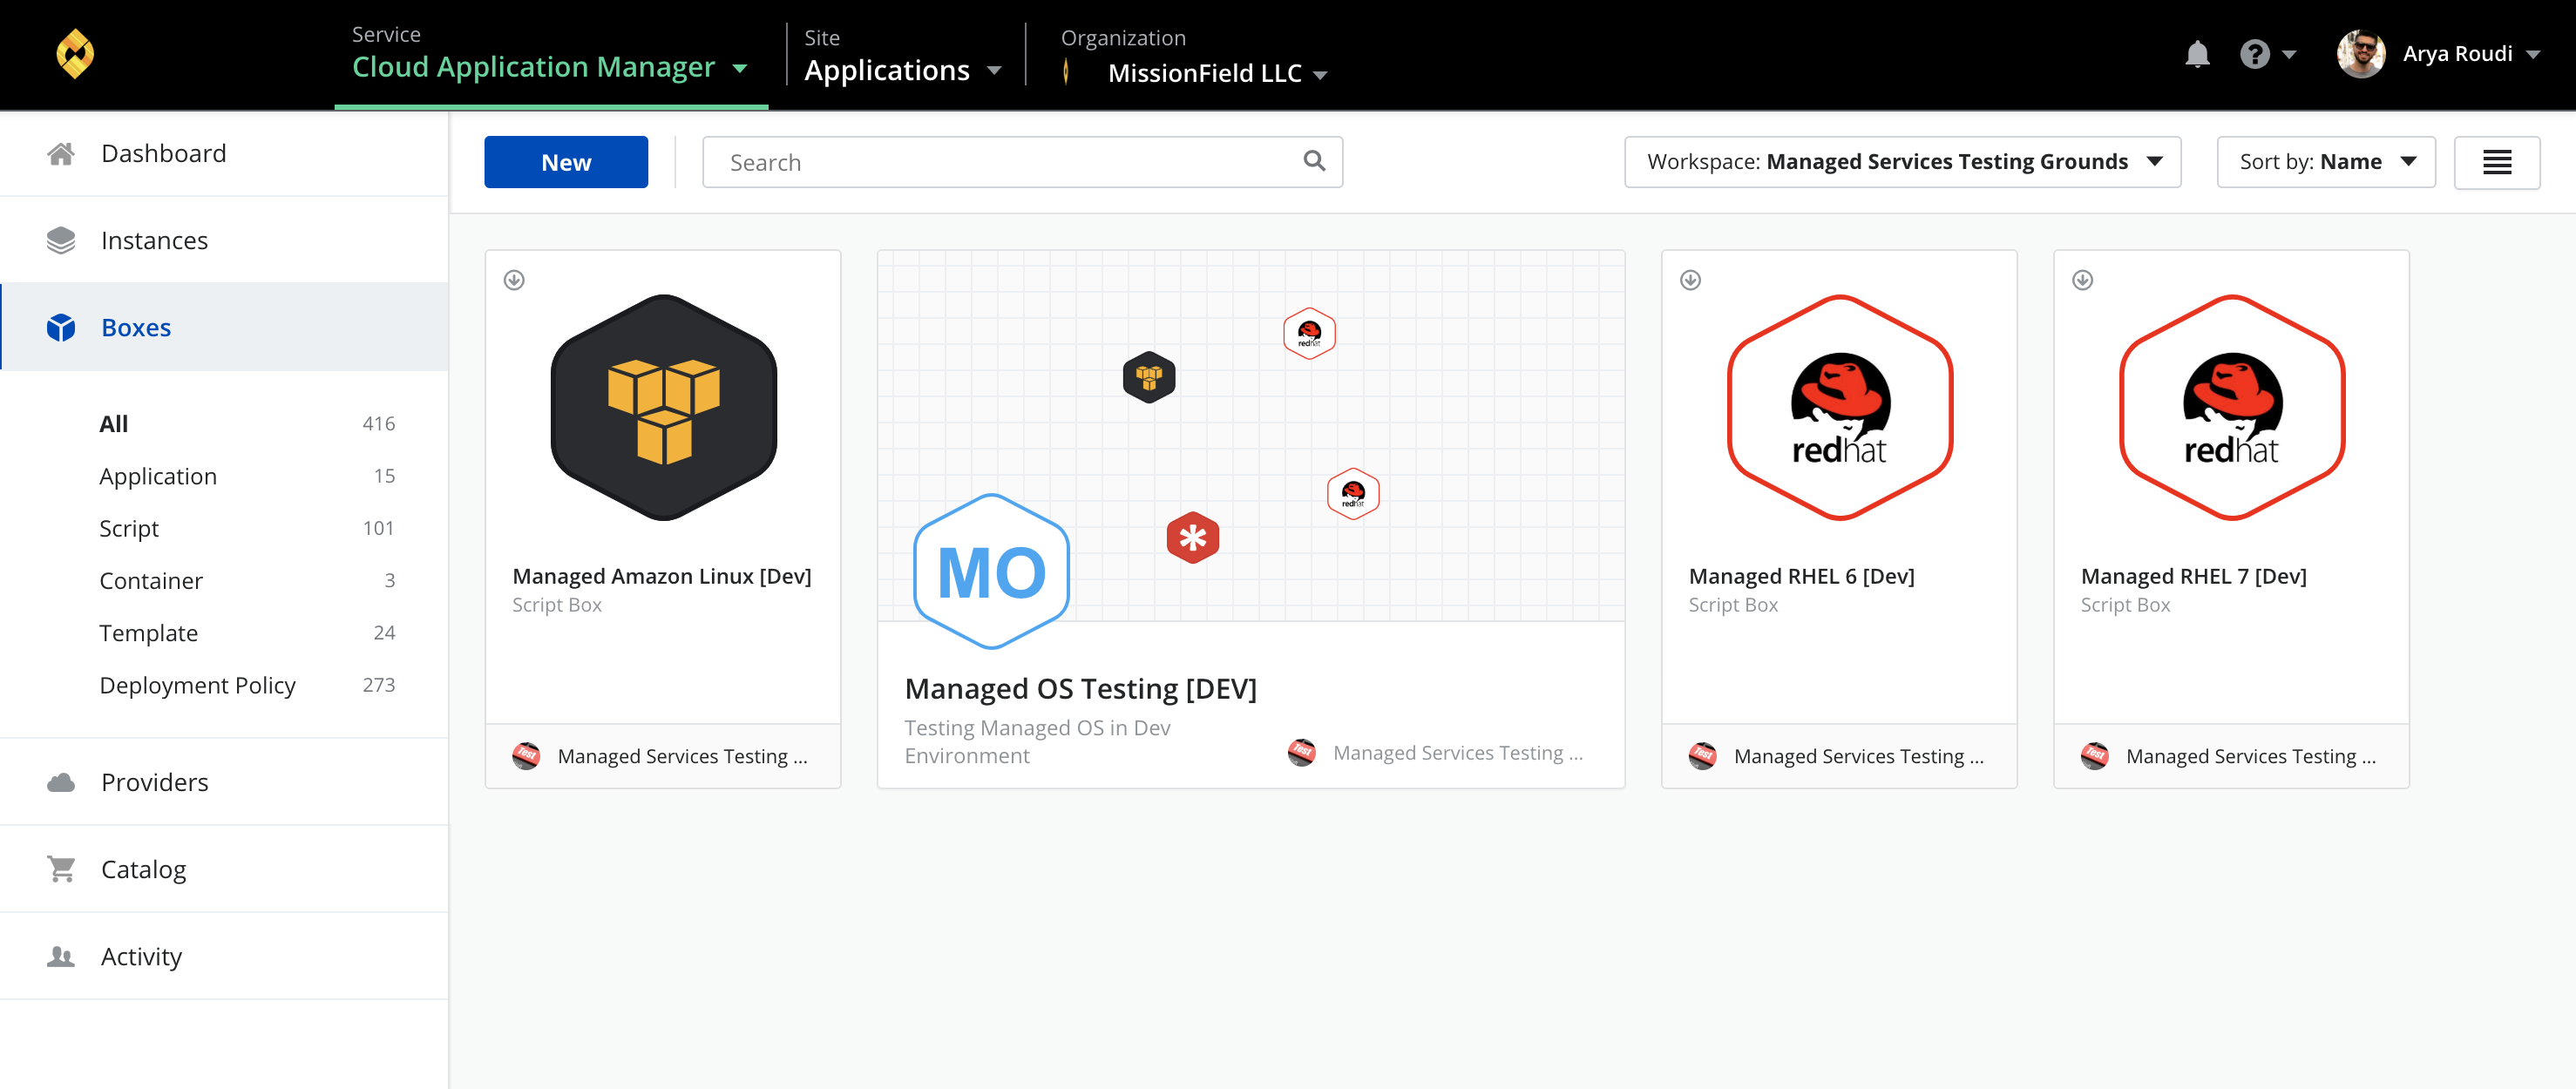
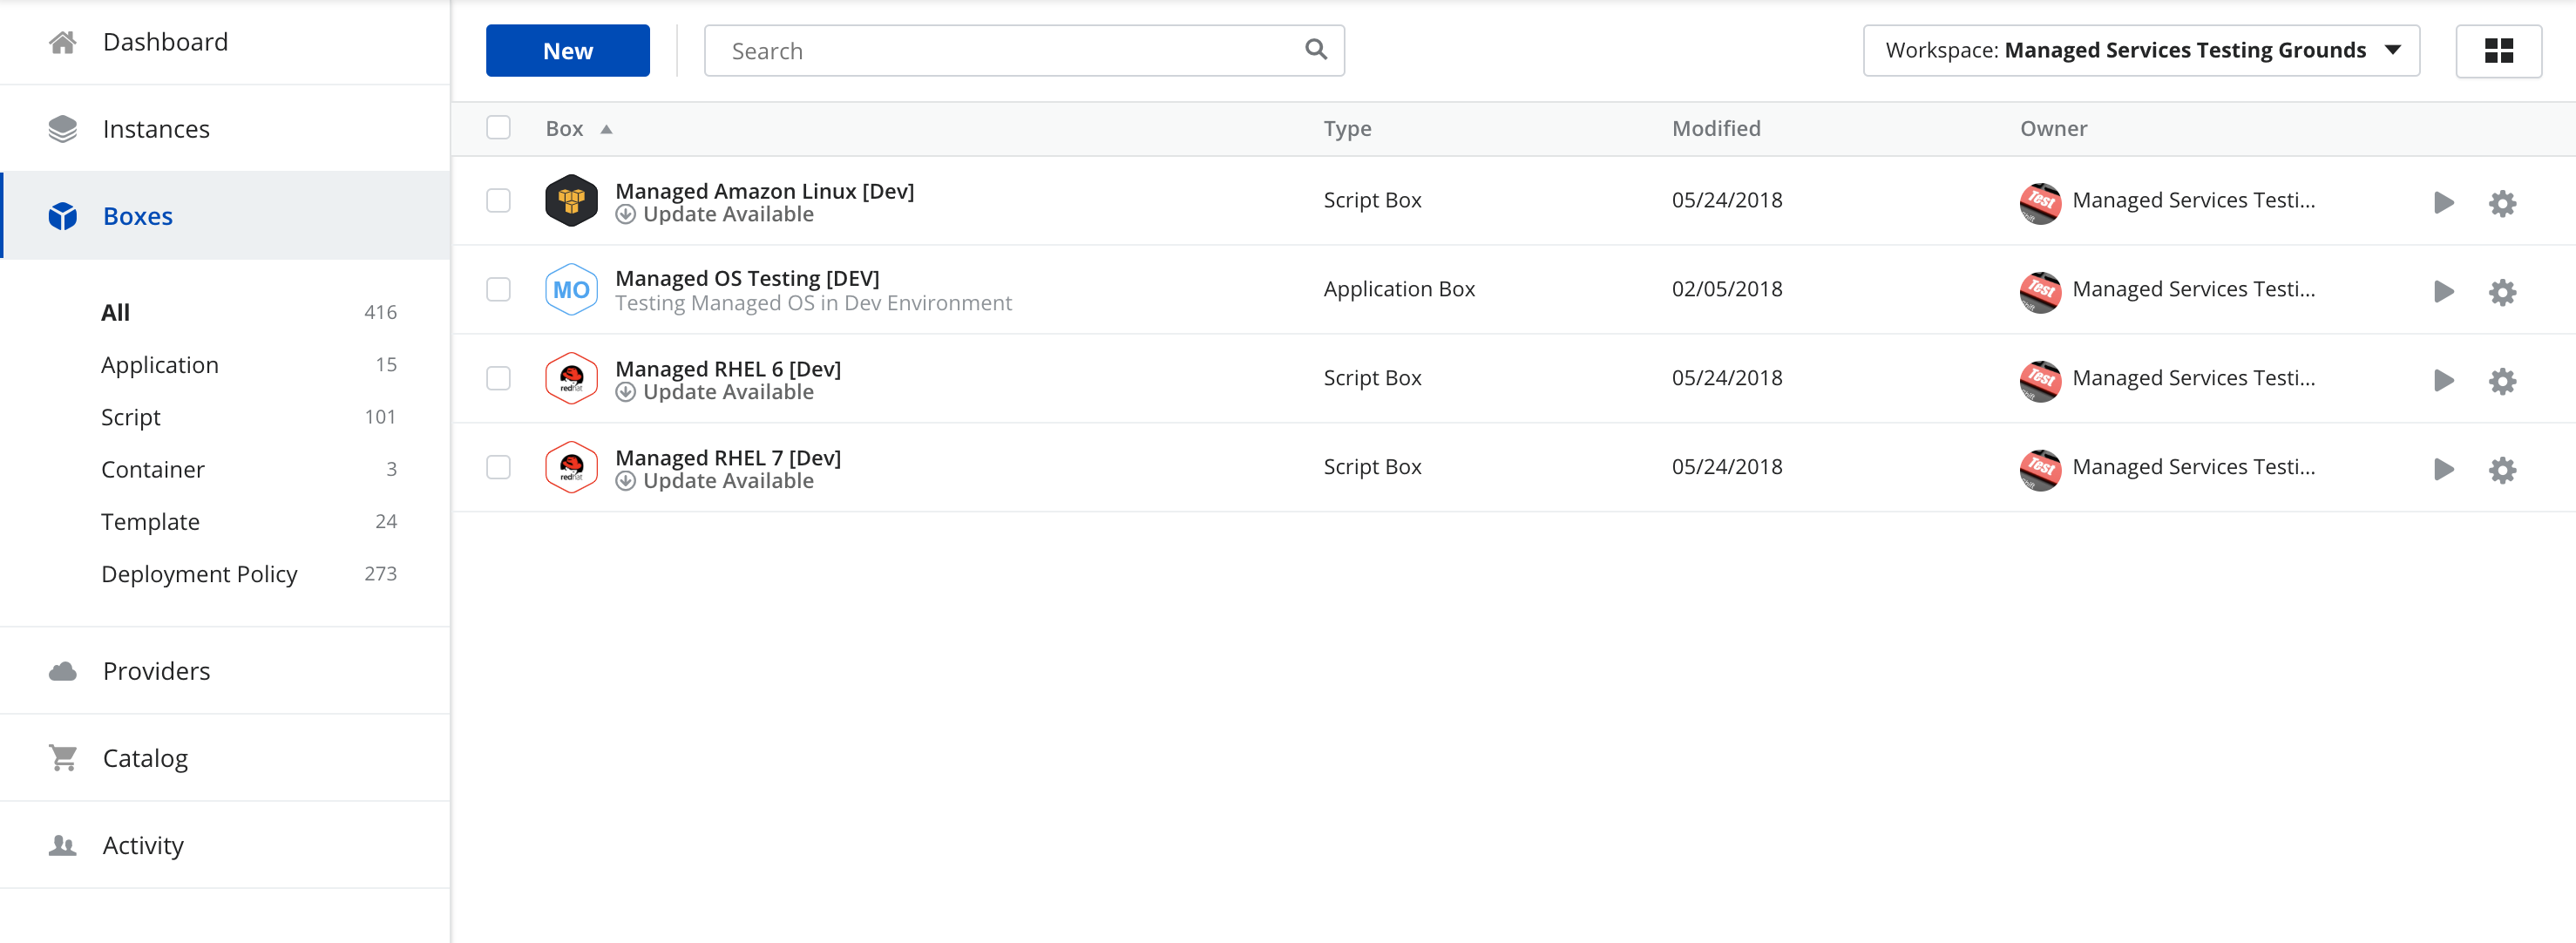
When you click on the Boxes left side menu the boxes page appears displaying all your available boxes in the current scope. You can display them as tiles with some information for each box, or as a list with a few columns showing basic information for them. To switch between these views you can click a button on the top-right corner of the page.

The tiles view displays a big icon, name, type and the owner of the box. When you hover on a tile, two action buttons appear allowing you to deploy or manage the box. You can sort the tiles by name (default), last modified or owner by selecting one of these values in the Sort by dropdown located on the top-right corner of the page, next to the change view mode button.

The list view displays for each element a small icon, name, type, when it was last modified, the owner and two action buttons for each box. You can order by any column by clicking on its header and, if you select any of the boxes in the list, a Bulk actions button appears so that selected boxes can be updated all at once.
The gear icon action button allows you to manage the box by performing additional actions such as sharing the box, editing its details, cloning or deleting it. These options will be available depending on your access permissions onto the box.
You can also use the filters above to narrow down the boxes being displayed by the workspace they belong to or the tags they have associated.
There are several types of boxes to address for your specific automation use case:
- Application boxes allow to configure several boxes to deploy an application with a single click.
- Script boxes let users automate using Bash, PowerShell, Salt, Ansible, Puppet, or Chef.
- Container boxes let users automate using container technology like Docker.
- Template boxes allow to automate using AWS CloudFormation, ARM, Google Deployments, Kubernetes or Terraform templates.
- Deployment Policy boxes provide the ability to select and share infrastructure resources, networking, and more from a cloud provider.
In the left side menu you can click on any of these types to filter by it on the view.
New Box
To create a new box, click on the New button in the Boxes page. Select a box type to match your automation:
Fill mandatory fields (with an *) and define some basic metadata described below.
Box metadata
| Metadata | Box Type | What it Means |
|---|---|---|
| Name, Description, Icon |
All | Give it a name and optionally a description and an icon. |
| Requirements | Script, Template, Container |
It’s good practice to tag the runtime that the box requires to deploy. Cloud Application Manager auto suggests tags like Linux, Ubuntu, Java and so on. When ready to launch the box, you are presented with deployment policies that match the requirements. These deployment policies provide the right infrastructure or services the box needs to deploy. Note: In CloudFormation boxes, the tags help you to look for binding instances. |
| Automatic Updates |
Script, Template, Container |
Select the level of updates to automatically apply to instances you launch of a box version: + Off - It’s turned off by default. + All Updates - Applies all changes. + Minor & Patch Updates - Applies minor and patch changes to the version deployed. + Patch Updates - Applies only the patch changes to the version deployed. |
| Provider | Deployment Policy |
Select the cloud provider registered in Cloud Application Manager for which you will carve out infrastructrure resources in the policy. |
| Claims | Deployment Policy |
Tag the services and infrastructure that a policy provides like Linux, Ubuntu 12.04, load balancing, and so on for deployments. Add claims so that the boxes with matching requirements can successfully deploy using the right policy. |
| Instance Lifespan | Deployment Policy |
Determines how to schedule instances for automatic expiration |
Box management
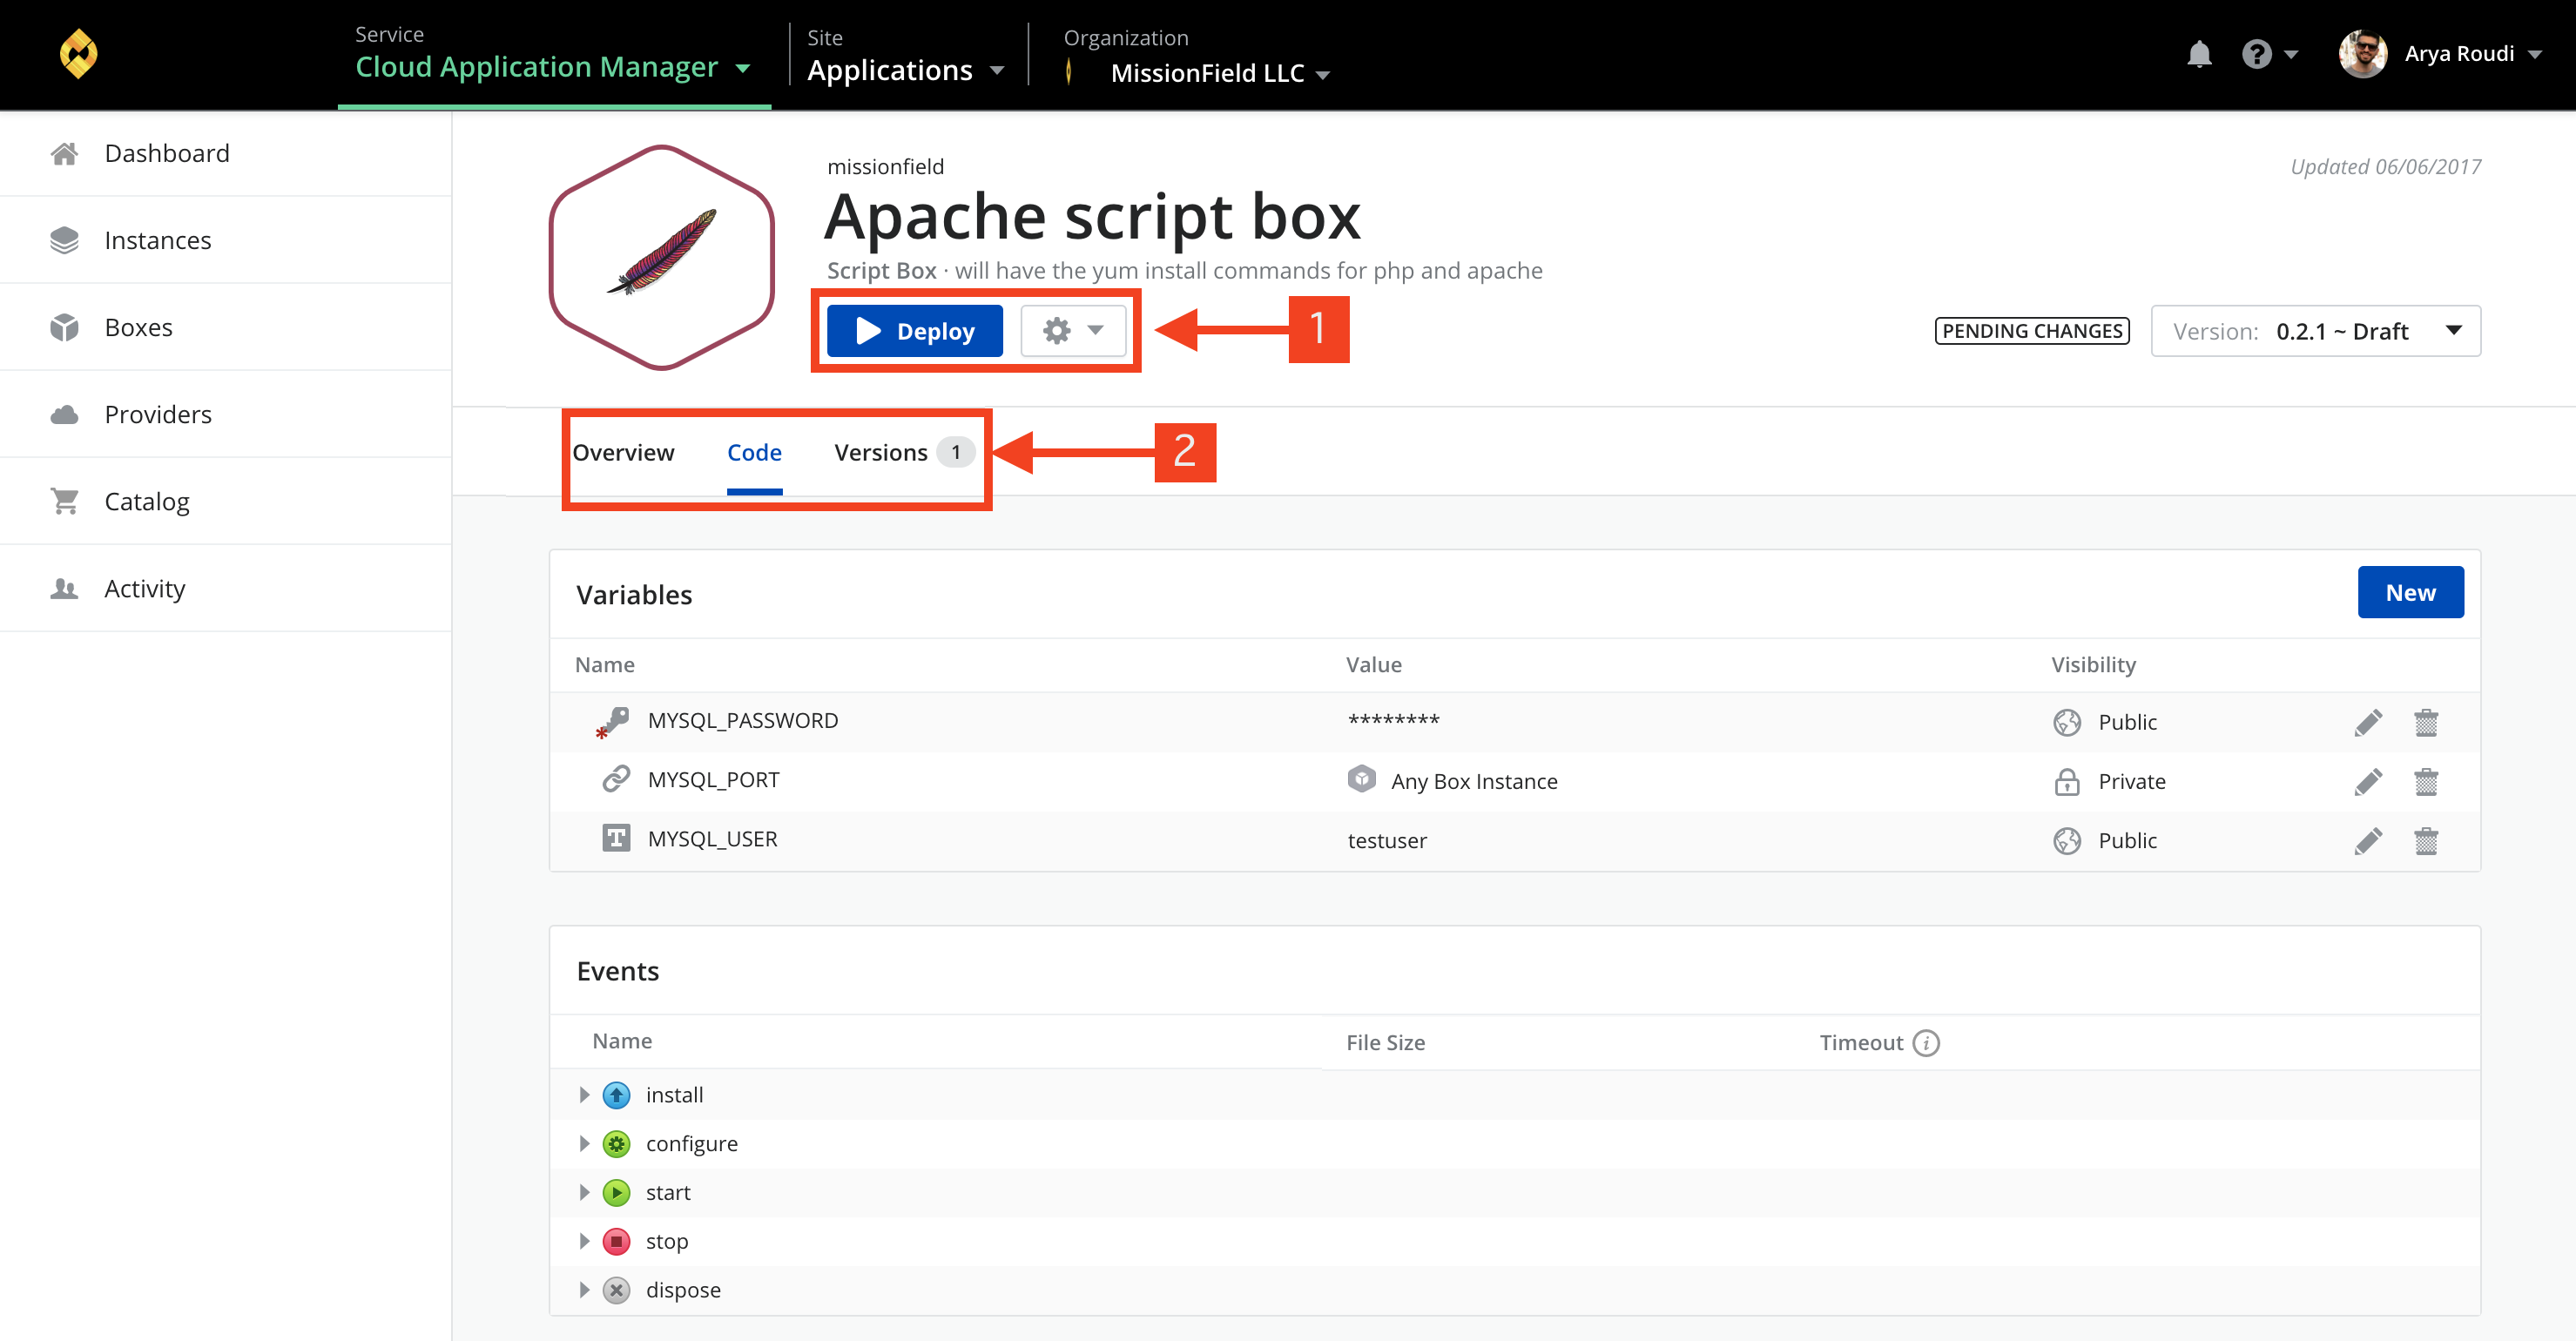
Once you create a box, you can configure and manage it in this panel:

Box Functions
Box Functions (marked with 1 in the figure) execute several commands for the Box
| Function | Description |
|---|---|
| Deploy | Launch a new instance of the box draft with this option. This lets you select a specific deployment policy to launch on a cloud provider. |
| Gear Menu | From here, you can edit basic metadata of the box, share or delete it. Edit Details - Allows box basic properties edition. Clone - Duplicates current box with same basic configuration. Share - Invite team members to collaborate and improve the configuration or just let them deploy the box. Delete Box - Removes current Box |
Box Sections
Box Sections (marked with 2 in the figure) display several configurations of the Box
| Section | Description |
|---|---|
| Overview | Get detailed information about your box. |
| Code | Automate how a piece of software deploys in the virtual environment by parameterizing with variables and events. |
| Versions | Keep track deployment configuration changes with the help of versioning. Versions let you consume different configurations of the same box in multiple deployments. From this tab, you can create a new version, see a diff of what changed, or restore a version as the box draft. |
Contacting Cloud Application Manager Support
We’re sorry you’re having an issue in Cloud Application Manager. Please review the troubleshooting tips, or contact Cloud Application Manager support with details and screenshots where possible.
For issues related to API calls, send the request body along with details related to the issue.
In the case of a box error, share the box in the workspace that your organization and Cloud Application Manager can access and attach the logs.
- Linux: SSH and locate the log at /var/log/elasticbox/elasticbox-agent.log
- Windows: RDP into the instance to locate the log at \ProgramData\ElasticBox\Logs\elasticbox-agent.log
